In this post we will look at how we can send notifications from Uptime Kuma to our Home Assistant. Home Assistant is behind Cloudflare Zero Trust.
I am using Uptime Kuma to monitor a bunch of my websites. I want to send notifications to Home Assistant when something goes wrong. But, my Home Assistant is behind Cloudflare Zero Trust so I could not use the Home Assistant notification type in Uptime Kuma. Instead, I had to use Webhooks.
Setting up a webhook in Home Assistant
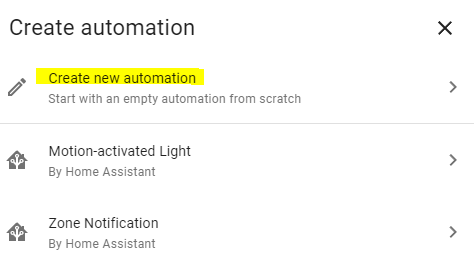
To set up a webhook click on Settings in the right menu, then on “Automations and Scenes”

Click on “Create new automation”
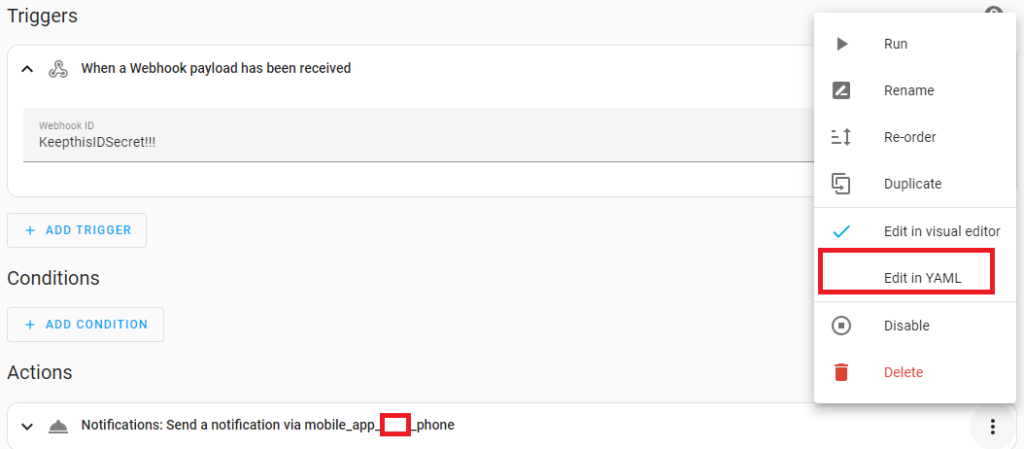
For Trigger, select Webhook and make sure to use a long difficult ID and keep that ID secret

You will access this webhook (POST request) via your Home Assistant URL and this path: https://your_ha_url/api/webhook/your_webhook_id
In the “Actions” section, select “Call Service” then select the device you want to receive the notification.

If you want to add custom data from the JSON that Uptime Kuma passes in the payload, you can click on “Edit in Yaml”
Use templating to get the custom data lilke this:
service: notify.mobile_app_leigh_phone
data:
  message: |-
    A website is down: Heartbeat
        {% if  trigger.json is defined  %}
            {{ trigger.json }}
        {% else %}
            {{ "no json data" }}
        {% endif %}
  title: Website Down
The IF statement checks if trigger.json in fact exists because if doesn’t, your event will not trigger.
trigger is used to get the payload, and trigger.json is used to get the JSON body payload, provided you are using the application/json Content Type in Uptime Kuma’s notification.
Uptime Kuma currently sends all this data in the Body
"Body": {
    "heartbeat": {
        "monitorID": 1,
        "status": 0,
        "time": "2023-03-26 10:07:50.153",
        "msg": "Request failed with status code 526",
        "important": true,
        "duration": 30
    },
    "monitor": {
        "id": 1,
        "name": "Password Pusher",
        "description": null,
        "url": "https://xxx.xxx.net/",
        "method": "GET",
        "hostname": null,
        "port": null,
        "maxretries": 2,
        "weight": 2000,
        "active": 1,
        "type": "http",
        "interval": 30,
        "retryInterval": 30,
        "resendInterval": 0,
        "keyword": null,
        "expiryNotification": false,
        "ignoreTls": false,
        "upsideDown": false,
        "packetSize": 56,
        "maxredirects": 10,
        "accepted_statuscodes": [
            "200-299"
        ],
        "dns_resolve_type": "A",
        "dns_resolve_server": "1.1.1.1",
        "dns_last_result": null,
        "docker_container": "",
        "docker_host": null,
        "proxyId": null,
        "notificationIDList": {
            "1": true
        },
        "tags": [],
        "maintenance": false,
        "mqttTopic": "",
        "mqttSuccessMessage": "",
        "databaseQuery": null,
        "authMethod": null,
        "grpcUrl": null,
        "grpcProtobuf": null,
        "grpcMethod": null,
        "grpcServiceName": null,
        "grpcEnableTls": false,
        "radiusCalledStationId": null,
        "radiusCallingStationId": null,
        "game": null,
        "httpBodyEncoding": "json",
        "includeSensitiveData": false
    },
    "msg": "[Test Website] [🔴 Down] Request failed with status code 526"
}
You can get more information about the trigger object here: https://www.home-assistant.io/docs/automation/templating/#important-template-rules
Setting up a Notification in Uptime Kuma
Now that we have set up the webhook in Home Assistant, let’s set up the Uptime Kuma part.
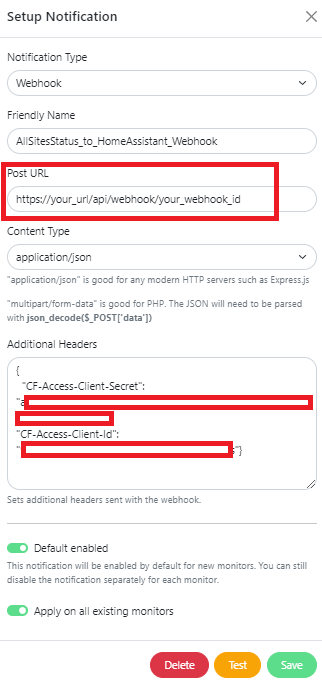
- First, enter the Post URL which will be the webhook id we created above.
- In the Additional Headers section, add your Cloudflare Zero Trust service token. We will explain this in more detail below.
- Then click on the Test button. The values for monitor and heartbeat will be None when you do a test, which is fine
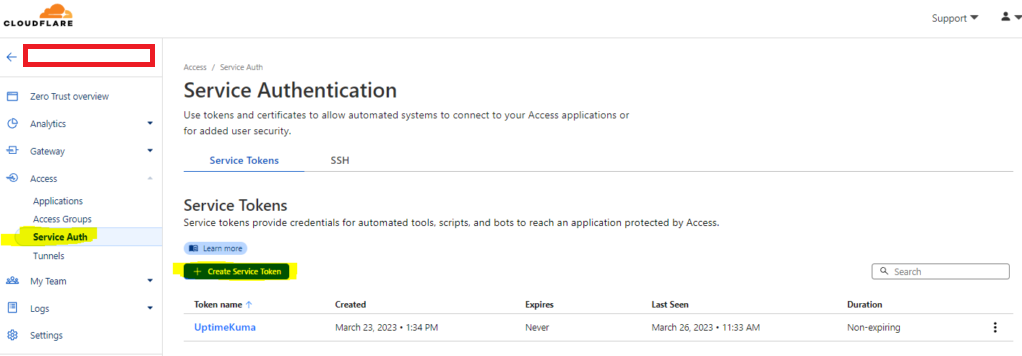
Creating a Service Token in Cloudflare
Log into cloudflare and go to the Zero Trust console. Click on Access, Service Auth, and create a new Service Token
Now go to the Application you want to allow this Service Token for and and add a new “Service Auth” policy.
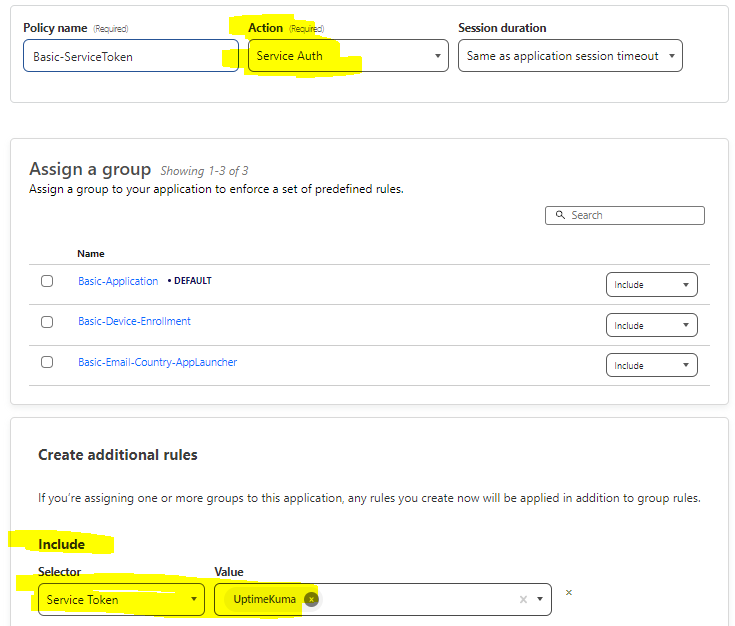
Now you will be able to connect to any application behind Cloudflare Zero Trust using this Service Token.